Leigh Richards


Furniture Cleaning Tips

Dealing with Candle Wax on Carpets: Do’s and Don’ts

Posted by Leigh Richards on

You’ve probably dealt with the frustration of candle wax spilling on your carpet, but don’t worry, it doesn’t have to ruin your carpet forever.

Let’s see how candle wax might end up on your carpets and learn the right and wrong ways to get rid of it. I’ll show you some practical ways to tackle those stubborn wax stains and give you tips to prevent future spills. Say goodbye to those ugly wax stains and hello to a spotless carpet once more.

Understanding Candle Wax on Carpets

So, you’ve got candle wax on your carpet – a classic household blunder that can throw a spanner in your day, right? Candles are great for setting the mood, filling the room with delightful scents, and giving off that cosy glow, but it’s a different story when that wax spills onto your carpet. You’re left with an ugly stain staring back at you, which could even mess up the fibres of your carpet.

What Causes Candle Wax to Get on Carpets?

You might have noticed that candle wax has a knack for finding its way onto your carpets. Whether it’s from accidentally knocking over a candle or dealing with wax drips from an overflowing candle holder, these situations can create quite a mess that’s not only an eyesore but also a pain to clean up. Accidents happen, like a sudden gust of wind, a curious pet passing by, or even just a clumsy bump.

To prevent these wax disasters, you must be mindful of where you place your candles. Avoid putting them near edges or on unstable surfaces that can easily lead to spills. Also, make sure your candle holders aren’t filled to the brim, as overflowing wax can drip and cause even more trouble. To avoid these issues, opt for sturdy candle holders and position your candles in safe spots away from high-traffic areas.

Dos for Removing Candle Wax

When removing candle wax from your carpets, you want to know some handy tips and tricks that will give you great results without wrecking your carpet fibres. Lucky for you, with just a few common household items, you can handle both melted and dried wax spills like a pro.

Effective Methods for Removing Wax

An effective method for removing wax from your carpets is to use a combination of heat and absorbent materials. Grab a warm iron and a brown paper bag to melt and lift that pesky wax away.

To start, lay the brown paper bag over the wax spot and gently glide the warm iron over it. The heat will melt the wax, and the paper bag will soak it up. Repeat this a few times until most of the wax is transferred onto the paper.

If there’s still residue left, grab some ice to harden the wax. Then, carefully scrape it off with a plastic scraper. After that, hoover the area to get rid of any leftover bits, and finish by dabbing with a clean cloth to lift off any remaining wax or colour.

Don’ts for Removing Candle Wax

When you have candle wax stains on your carpets, be sure to avoid certain methods and cleaning products that could ultimately cause more harm than good.

Things to Avoid When Removing Wax

Avoid using rough scrubbing techniques and abrasive materials to remove candle wax from your carpets. These methods can cause discolouration and damage to the carpet fibres.

Scrubbing too hard or using coarse materials can visibly harm your carpet and weaken its fibres in the long term. Many commercial cleaners have strong chemicals that might strip away the carpet’s protective layer, leaving it more vulnerable to stains and wear. Instead, consider using milder solutions like white vinegar or mild washing-up liquid mixed with water.

Regularly maintaining and cleaning your carpet with proper techniques can keep it looking great and prolong its lifespan.

Preventing Candle Wax on Carpets

To prevent candle wax spills on your carpets, you must proactively keep your floors safe and enhance fire safety. This way, you can enjoy using candles to create the atmosphere and establish a cosy ambience without worrying about any mess or hazards.

Tips for Avoiding Wax Spills

To avoid wax spills:

  1. Make sure you’re using stable and suitable candle holders that match your home decor, and keep fire safety in mind.
  2. When picking out a candle holder, choose one with a wide, flat base to keep those candles standing tall.
  3. Look for metal, glass, or ceramic that can handle the heat.

When you’re placing those candles, keep them far away from anything flammable, like curtains. Put them in spots where they can really set the mood, like on the mantelpiece or dining table.

Scented candles aren’t just for looks – they also bring a lovely aroma to your space, making it super cosy and welcoming.

Dealing with Stubborn Wax Stains

When you’re faced with stubborn wax stains on your carpets, you must combine powerful stain-removal methods with reliable household remedies. That way, you can ensure there are no leftover residues, keeping your carpet fibres in top condition.

Removing Residue and Stains

To remove wax residues and stubborn stains from your carpet fibres, try a mix of household remedies like white vinegar and bicarbonate of soda, or get specific with tools like a heat gun or commercial stain removers. Here’s how you can tackle it:

  1. Start by gently scraping any excess wax with a butter knife or spoon.
  2. Then, mix lemon juice and warm water in a spray bottle and spritz it on the stained area. Let it sit for a while to work its magic on the wax.
  3. Grab a clean cloth and blot the area to soak the softened wax.
  4. For those really tough stains, go for petroleum jelly or fabric conditioner directly on the spot. Use a scrubbing brush to dig into the fibres and break down the residue.
  5. Finally, clean the area thoroughly with a mixture of gentle detergent and warm water to remove all traces of wax.
Furniture Cleaning Tips

How To Safely Remove Chewing Gum From Your Upholstered Furniture

Posted by Leigh Richards on

We’ve all been there—a piece of chewing gum on our living room sofa causes a sticky mess. But fear not—we have the solution for you. From using ice to applying vinegar, we’ll provide a step-by-step guide to effectively remove chewing gum from your upholstered pieces. Plus, we’ll share preventative measures to avoid future mishaps.

Say goodbye to sticky situations with our expert tips!

The Problem with Chewing Gum on Upholstered Furniture

Dealing with chewing gum can be a frustrating challenge, especially when it leaves behind a sticky residue that can be tough to remove from the fabric. The sticky nature of gum can easily adhere to settees, sofas, and seats, causing unsightly stains and requiring careful removal techniques to prevent damage to the furniture.

The impact of sticky residue varies depending on the fabric used in the upholstery. For instance, gum stuck to delicate silk or velvet fabrics can be tricky to deal with without causing further harm.

Regular maintenance and prompt action are crucial in such cases to preserve the fabric’s longevity and appearance. Adopting good habits like routine cleaning and using appropriate cleaning agents can effectively combat gum-related mishaps and maintain the beauty of your upholstered furniture.

What Tools Do You Need to Remove Chewing Gum from Upholstered Furniture?

To effectively remove chewing gum from upholstered furniture, you will need a few essential tools such as ice, a plastic bag, a butter knifevinegar, and a suitable cleaning solution. These tools are crucial in safely eliminating gum and its residue from fabric surfaces.

Ice hardens the gum, making it easier to scrape off with the butter knife without damaging the fabric. The plastic bag helps contain any melted gum or debris for easy disposal. Vinegar acts as a natural solvent to break down the sticky residue left by the gum. A suitable cleaning solution ensures the upholstery is left clean and fresh after the gum removal process.

When using these tools, it is crucial to handle them with care to prevent any accidental damage to the fabric.

Ice

Using ice to freeze the gum is a common first step in removing it from upholstered furniture. The cold temperature helps harden the gum, making it easier to scrape off without damaging the fabric. Ice is a gentle and effective tool for tackling sticky residue on various types of upholstery.

Freezing gum involves placing an ice pack or ice cubes in a plastic bag and then directly applying it to the gum. As the gum chills and hardens, it loses its adhesive properties, allowing it to be gently peeled or scraped away. This technique is particularly beneficial for cleaning fabric surfaces because it does not involve harsh chemicals that could discolour or weaken the material. Ice is a safe and eco-friendly gum removal method accessible to anyone with a freezer.

Plastic Bag

A plastic bag can scrape frozen gum from upholstered furniture without damaging the fabric. Gently scraping the gum with a plastic bag removes the sticky residue without leaving marks or stains on the upholstery.

This technique works particularly well for gum that has hardened onto the fabric. To enhance its effectiveness, you can freeze the gum first by applying an ice pack or ice cube wrapped in a cloth. Once the gum hardens, use the plastic bag to scrape it off in a smooth, circular motion. Remember to apply minimal pressure to avoid tearing or damaging the upholstery fibres. It’s also helpful to reposition the bag frequently to prevent further gum spreading.

For any remnants left behind, dab a mixture of warm water and mild detergent on a clean cloth and gently blot the area until the adhesive is completely removed.

Butter Knife

butter knife is helpful for delicately scraping gum remnants from upholstered furniture. Its flat edge allows for precise and controlled scraping, removing sticky residue without damaging the upholstery fabric.

You can gradually lift the butter knife off the gum by gently sliding it under the fabric. Maintaining a steady hand and applying gentle pressure is essential to avoid tearing or snagging the material. Remember to work in small sections and avoid rushing the process to prevent accidental damage. The butter knife’s thin blade makes reaching tight spots where gum may be lodged easier. Proceed cautiously and periodically check the fabric for signs of stress or stretching to ensure a successful gum removal process.

Vinegar

Vinegar can be a natural cleaning solution for tackling gum residue on upholstered furniture. Its acidic properties help break down sticky residues and stains, making it an effective option for restoring the fabric to its original state.

When dealing with gum residue on upholstery, acting quickly to prevent the stain from setting in is essential. To use vinegar for this purpose:

  1. Mix one vinegar with two parts of water in a spray bottle.
  2. Lightly mist the affected area and allow the solution to soften the gum for a few minutes.
  3. Gently blot the area with a clean cloth, repeating as required until the residue is removed.

Incorporating this vinegar cleaning step into your regular upholstery maintenance routine can help keep your furniture looking fresh and clean.

Cleaning Solution

A suitable cleaning solution can help eliminate any remaining traces of gum residue from upholstered furniture. Whether a fabric conditioner or a specialised cleaning agent, the solution should be applied carefully to ensure effective removal without damaging the upholstery.

It is crucial to choose a cleaning solution that is gentle yet effective on the specific fabric of your upholstered furniture. A mild, non-abrasive cleaning solution is recommended for delicate fabrics like silk or velvet to prevent discolouration or damage.

On the other hand, for tougher fabrics such as polyester or microfiber, a stronger cleaning agent may be necessary to remove gum residue thoroughly. Always test the cleaning solution on a small, inconspicuous area first to ensure compatibility before proceeding with the entire cleaning process.

Step-by-Step Guide to Removing Chewing Gum from Upholstered Furniture

  1. Follow this step-by-step guide to remove chewing gum from upholstered furniture using simple solutions and gentle removal techniques. By following these methods carefully, you can prevent damage to the fabric and ensure a clean finish on your furniture.

One of the first steps involves applying ice to harden the gum. It makes it easier to peel off without smearing. Once the gum is hardened, gently scrape it off using a plastic scraper or a credit card. Be patient and avoid pulling too hard to prevent tearing the fabric.

After removing the gum, dab a small amount of vinegar or rubbing alcohol on a clean cloth and gently blot the area to remove any leftover residue. Allow the fabric to air dry completely before using the furniture again to maintain its pristine condition.

Freeze the Gum with Ice

Start by freezing the gum with ice to harden it and make it easier to remove from the upholstery. This simple DIY solution helps prepare the gum for gentle removal without damaging the fabric.

  1. To freeze the gum effectively, place a few ice cubes in a plastic bag and press it against it.
  2. Allow it to sit for a few minutes until the gum hardens. The ice’s cold temperature helps solidify the gum, making it less sticky and more manageable to lift off the surface.

This method is convenient and cost-effective. It requires minimal supplies that are readily available in most households. With this straightforward approach, homeowners can easily tackle gum removal themselves, saving time and money on professional cleaning services.

Scrape off the Gum with a Plastic Bag and Butter Knife

Use a plastic bag and a butter knife to scrape the gum from the fabric. This quick-fix method effectively removes stuck gum residues without extensive effort, ensuring a prompt solution to the problem.

Place the plastic bag over the gum-stained area and gently scrape the surface with the butter knife, allowing the gum to stick to the bag. The soft and flexible nature of the plastic bag helps peel off the gum without leaving behind any sticky residues. This method not only prevents damage to the fabric but also efficiently gets rid of stubborn gum stains. Repeat the scraping process for immediate results until all gum remnants are entirely removed.

Apply Vinegar or Cleaning Solution to the Residue

Apply vinegar or a suitable cleaning solution to the affected area for persistent gum residue. These solutions not only aid in residue removal but also help clean up any remaining traces and eliminate odour for a refreshed upholstery finish.

To ensure effective removal, gently blot the affected area with a clean cloth soaked in the vinegar solution. Allow it to penetrate for a few minutes before gently scrubbing it with a soft-bristled brush. The acidic properties of vinegar break down the gum residue, making it easier to lift off. Once the residue is removed, wipe the area with a damp cloth to remove any remaining residue and odour, leaving your upholstery looking and smelling fresh.

Blot the Area with a Clean Cloth

After using the cleaning solution, dab the area with a clean cloth to absorb any remaining residue and ensure proper fabric protection. This final step helps achieve a clean finish and maintain the upholstery’s appearance.

It is crucial to use cleaning supplies designed explicitly for upholstery to effectively remove gum residues without causing damage. Once the residue is removed, gently wipe off any remaining traces to prevent them from penetrating further into the fabric. Applying a fabric protector can significantly prolong the lifespan of your upholstery by creating a barrier against future stains and spills. Investing time and care in post-gum removal can leave your furniture looking fresh and well-maintained for years.

Preventative Measures for Future Chewing Gum Mishaps

To avoid future chewing gum mishaps on upholstered furniture, it’s essential to adopt preventative measures that safeguard the fabric and prevent sticky situations.

Ensuring everyone in your household knows the importance of keeping gum away from furniture can significantly reduce the risk of accidental spills.

Investing in stain-resistant fabrics or applying fabric protectors can create an extra barrier against gum infiltration.

Regularly vacuuming and spot-cleaning any spills or stains promptly can also help maintain the fabric’s longevity and appearance.

By following these practical tips, you can actively preserve the integrity of your upholstered furniture and enjoy a gum-free living space.

Educate Family Members and Guests

One effective preventive measure is to educate family members and guests about the do’s and don’ts of chewing gum around upholstered furniture. Setting clear guidelines and promoting responsible gum disposal habits can reduce the risk of sticky situations and facilitate easy cleanup.

Emphasising the importance of prompt cleanup to prevent gum-related incidents is crucial. Encouraging individuals to dispose of their gum correctly in designated bins or wrappers can significantly minimise the chances of accidents.

Reminding everyone to be mindful of where they place their gum and to avoid leaving it on furniture or other surfaces can help maintain a clean and hygienic environment. Proper gum etiquette ensures a pleasant experience for everyone and contributes to a more organised and respectful atmosphere.

Use Protective Covers

Another preventative measure involves using protective covers on upholstered furniture to shield it from potential gum damage and facilitate easy cleanup. These covers offer furniture protection and add a decorative element to your home décor, enhancing the overall aesthetic appeal of your living space.

With various styles, patterns, and materials, protective covers can complement different upholstery types, blending seamlessly with your existing furniture. In addition to safeguarding against spills, stains, and pet fur, these covers can also prolong the life of your valuable furniture pieces, reducing the need for costly repairs or replacements.

When selecting covers, consider factors like size, durability, and ease of maintenance to ensure a perfect fit and hassle-free upkeep for your furniture.

Regularly Clean and Vacuum Upholstered Furniture

Maintaining a regular cleaning routine that includes hoovering and gentle upholstery care can help prevent chewing gum mishaps and maintain fabric integrity. Using mild soap, a soft brush, and household tips for spot cleaning can contribute to effective upholstery maintenance and gum prevention.

  1. Regularly hoovering upholstered furniture keeps it looking fresh and helps remove debris that can attract chewing gum.
  2. When it comes to cleaning, a mixture of mild soap and water and a soft-bristled brush can effectively tackle spills and stains without damaging the fabric.
  3. Household tips like using bicarbonate or soda to absorb odours or a mixture of vinegar and water for stubborn marks are additional techniques for preserving the longevity of your upholstered pieces.
Furniture Cleaning Tips

Your Comprehensive Guide To Leather Furniture Cleaning

Posted by Leigh Richards on
Your Comprehensive Guide To Leather Furniture Cleaning

Leather furniture exudes elegance and sophistication, adding a touch of luxury to any home. However, proper cleaning and maintenance are essential to maintain its pristine condition and ensure it lasts for years to come. As a seasoned furniture cleaner based in London, I’ve encountered various challenges when caring for leather furniture. In this comprehensive guide, I’ll share my expert advice on how to clean leather furniture effectively, remove stains, prevent cracking and shrinking, preserve colours, and handle the unique challenges posed by pets.

Understanding Leather

Before we discuss the cleaning process in more detail, it’s crucial to understand the nature of leather. Leather is a natural material crafted from the hides of animals, typically cattle, goats, sheep, and pigs. Each type of leather undergoes different treatments and finishing processes, resulting in distinct characteristics and levels of durability.

  1. Aniline Leather: Known for its luxurious feel and natural appearance, it is the most delicate and high-end type of leather. It’s dyed exclusively with soluble dyes without additional pigments or protective coatings, allowing the natural grain and markings to shine through. While aniline leather offers unparalleled softness and beauty, it’s also susceptible to stains, fading, and wear. Therefore, it requires gentle care and regular maintenance to preserve its pristine condition.
  2. Semi-Aniline Leather: Semi-aniline leather balances the natural look of aniline leather and the durability of pigmented leather. It’s treated with a light protective coating or pigment layer that provides some resistance to stains and fading while retaining the softness and natural characteristics of the leather. Semi-aniline leather is more forgiving than aniline leather and can withstand moderate use, making it a popular choice for furniture upholstery.
  3. Pigmented Leather: Also known as corrected-grain leather, pigmented leather is the most durable and low-maintenance type. It’s coated with a layer of pigments and protective finishes that enhance its resistance to stains, scratches, and fading. Pigmented leather is less breathable and natural-looking than aniline and semi-aniline leather, but it offers superior durability and ease of maintenance. It’s an excellent option for high-traffic areas and households with children and pets.

Understanding the type of leather used in your furniture is essential for determining the appropriate cleaning and maintenance techniques. Aniline leather requires gentle care and protection against stains and fading, while pigmented leather is more forgiving and resistant to wear. By identifying the type of leather and its unique characteristics, you can ensure that your furniture receives the proper care and attention it deserves, prolonging its lifespan and beauty for years to come.

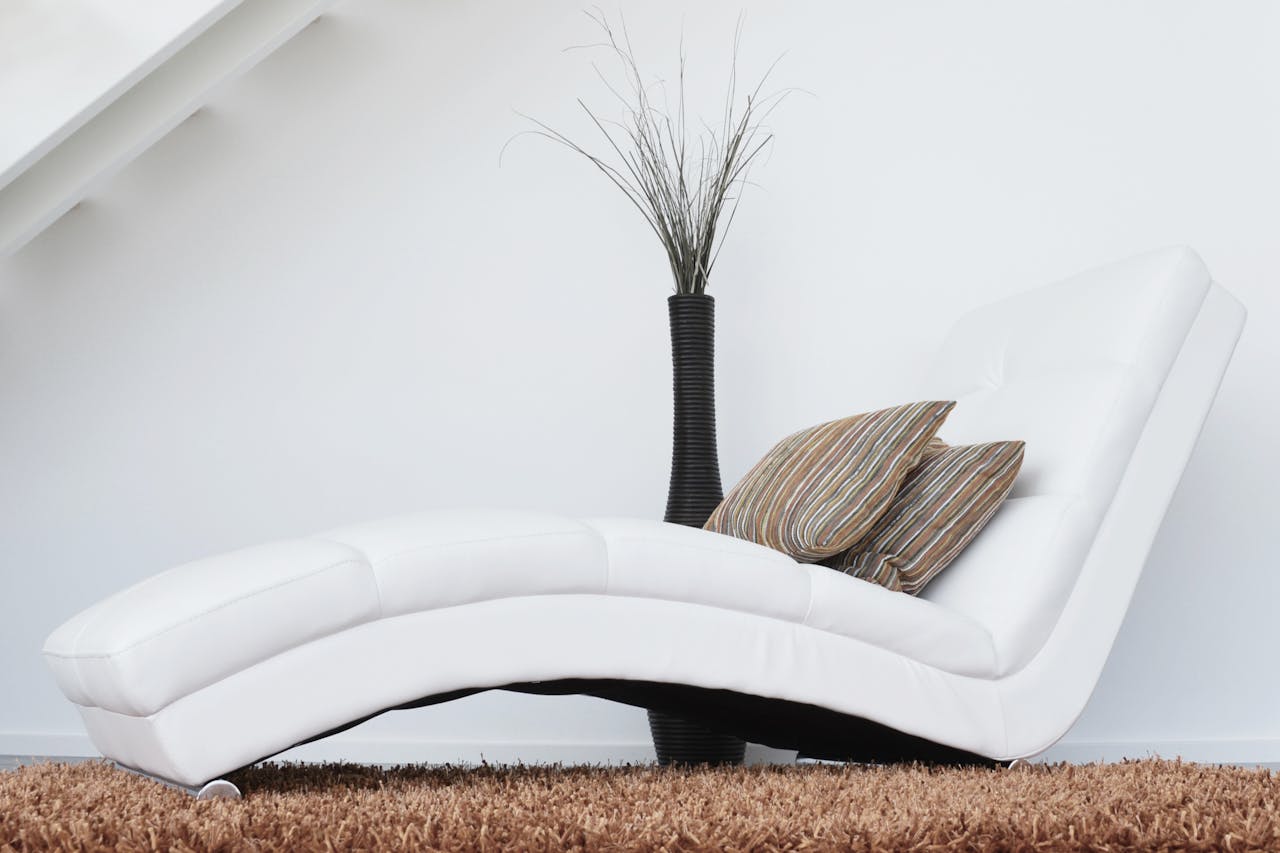
A design white leather fainting couch

General Cleaning Tips

Regular maintenance is critical to preserving the beauty of your leather furniture. Here are some general cleaning tips to keep in mind:

  1. Dust Regularly: Use a soft, dry cloth or vacuum with a brush attachment to remove dust and debris from the surface of the leather.
  2. Spot Test: Before applying any cleaning solution, always test it on a small, inconspicuous area of the furniture to ensure compatibility and prevent damage.
  3. Use Gentle Products: Opt for mild, pH-balanced leather cleaners specifically formulated for your type of leather. Avoid harsh chemicals, alcohol-based cleaners, or ammonia, as they can strip the natural oils and damage the leather.
  4. Avoid Water: While it may be tempting to use water for cleaning, excessive moisture can cause the leather to warp, crack, or develop water stains. Instead, use minimal water and dampen a cloth slightly for spot cleaning.

Removing Stains

Stains are inevitable, but they don’t have to be permanent. Here’s how to tackle common stains on leather furniture:

  1. Ink Stains: Dab a small amount of rubbing alcohol or non-acetone nail polish remover onto a clean cloth and gently blot the stain until it lifts. Avoid rubbing, as it can spread the ink further.
  2. Oil and Grease Stains: Sprinkle cornstarch or talcum powder over the stain and let it sit for several hours to absorb the oil. Then, gently brush off the powder with a soft brush or cloth.
  3. Food and Drink Stains: Blot the stain immediately with a clean, dry cloth to absorb excess liquid. Then, use a mild leather cleaner to gently remove the remaining stain, following the manufacturer’s instructions.
  4. Mould and Mildew: Mix equal parts of water and white vinegar in a spray bottle and lightly mist the affected area. Wipe away the mould with a clean, damp cloth and allow the leather to air dry thoroughly.

Preventing Cracking and Shrinking

Leather can dry out and crack if not properly moisturised and conditioned. Follow these tips to prevent damage and maintain the suppleness of your leather furniture:

  1. Condition Regularly: Apply a high-quality leather conditioner every 6-12 months to replenish moisture and keep the leather soft and supple. Massage the conditioner into the leather in a circular motion and wipe away any excess with a clean cloth.
  2. Avoid Direct Sunlight: Prolonged exposure to sunlight can cause the leather to fade, dry out, and crack. Position your furniture away from direct sunlight or use blinds, curtains, or UV-protective window film to shield it from harmful rays.
  3. Maintain Humidity: Leather thrives in a moderate humidity environment. Use a humidifier during dry winter months to prevent the leather from drying out and cracking.

Preserving Colours

To keep your leather furniture looking vibrant and lustrous, follow these tips to preserve its colour:

  1. Use Leather Protectant: Apply a leather protectant with UV inhibitors to shield the leather from fading and discolouration caused by sunlight exposure.
  2. Clean Spills Promptly: Clean up spills and stains promptly to prevent them from penetrating the leather and causing permanent discolouration.
  3. Rotate Cushions: If your leather furniture has removable cushions, rotate them regularly to ensure even exposure to light and prevent uneven fading.

Dealing with Pets

Pets can be a joy, but they can also challenge leather furniture. Here’s how to minimise damage caused by cats and dogs:

  1. Cover Furniture: Consider using washable, pet-friendly covers or throws to protect your leather furniture from scratches, stains, and pet hair.
  2. Trim Nails: Keep your pet’s nails trimmed to reduce the risk of scratching the leather surface. Provide scratching posts or pads as an alternative outlet for their scratching behaviour.
  3. Clean Regularly: Vacuum your leather furniture frequently to remove pet hair and dander. Use a lint roller or damp cloth to remove stubborn pet hair from crevices and seams.

Conclusion

Proper care and maintenance allow your leather furniture to remain a timeless and elegant addition to your home. Following the tips outlined in this comprehensive guide, you can keep your leather furniture looking as good as new for years. Remember to choose suitable cleaning products, address stains promptly, prevent cracking and fading, and take proactive measures to protect your furniture from pets. With a little effort and regular upkeep, your leather furniture will continue to showcase its beauty and durability for generations to come.

Uncategorized

Can I Skip The Vacuum Cleaning?

Posted by Leigh Richards on

In my not so humble estimation, at least 90% of the people hate doing their housekeeping chores, and carpet cleaning is close to the top of most disliked tasks. It should come as no surprise, therefore, that homeowners look for a time and energy-saving alternatives – the trendy carpet cleaning robots, more aggressive treatment methods, or booking a professional to do the job.

The first question I get when I visit a home for the preliminary inspection is “can I skip the vacuum cleaning altogether?” If you recognise yourself in this profile, you probably will not like my answer. No, it is not a good idea to put the vacuum cleaner in the closet and never turn it on again. Vacuuming your carpets will not solve the more complicated issues – but not doing it will undoubtedly cause severe problems in the long run.

Regardless of what you do, dust and microparticles will always find their way in your home. The most logical place for them to end up is on the floor, i.e. in the fabrics of your carpet. As time goes by this residue will build up and penetrate deeper and farther in between the threads, and will cause decolourisation, loosening, and even irreparable damage to your carpets.

The easiest way to counter this is to vacuum your carpets at least once per week. For further tips and more carpet care advice, stay tuned for our regular updates!

Here is an interesting fact that I bet you probably didn’t know. Carpet fibres act as an air filter in your home. Dust particles circulate in the air and at some point they land on the surfaces. If your floor is covered in laminate, wood or any other kind of hard flooring, the dust will settle there until the next air movement puts it back to being airborne. The risk of dust entering your lungs increases. With carpet though, dust gets trapped within the fibres and no re-circulation is possible. When you vacuum you extract these trapped dust particles, instantly improving indoor air quality.